Table of Contents
Beginners Guide to Tracking using dl-fldigi
This is a short guide to receiving live tracking data from a balloon sending out GPS fixes. Covering setting up a radio, computer and the software to upload the tracking data to a central server.
Another excellent guide can be found at Project Horus
Translations
Components
- Radio Receiver - needs to be able to receive between 430MHz and 440MHz (also known as the 70cm band (as the wavelength is 70cms long)) and also be able to receive SSB (single side band), it is important to note that this isn't FM, many radios only receive FM so look for SSB (which may be described as USB and LSB). Examples of radios used by present UKHAS members include:
- Yaesu FT-790R - old but amazing, can sometimes be found on ebay for around £100
- Yaesu FT-817(ND) - probably now the favourite, very wide range of receive and transmit and is portable due to a battery. approx £450
- Icom IC-7000 - Literally does everything and a little bit more. approx £900
- AOR AOR8000 - Wideband Receiver (doesn't do Transmitting)
- Yupiteru MVT-7100 - Wideband receiver (doesn't do Transmitting)
- Kenwood TS-2000 - Similar to the IC-7000 in that it literally does everything but a bit older and cheaper.
- Kenwood TH-F7E - Hand Held dual radio with a 2nd wideband multimode receiver. Not as sensitive as other receivers but very portable (and can monitor the local repeater at the same time)
- SDR Dongle - If you don't fancy investing in an expensive radio receiver, then it is now possible to use a USB DVB-T dongle, based on the Realtek RTL2832U chipset, as an inexpensive tracker. This is a superb way to get involved with HAB'ing and helping out track other people's balloons.
- FUNcube Dongle Pro+ - An alternative SDR receiver. More sensitive than the cheap SDR dongles but more expensive. Sensitivity is similar to the Radio receivers listed above.
- Radio Antenna for 70cm - An excellent guide to understanding directional antennas can be found on this Youtube video by Diana Eng of Make Magazine - while its for transmitting its the same concept for receiving!
- Whip (often included with the receivers) is an omni-directional antenna and is good when the payload is close by but will also pick up other signals and noise.
- Yagi - directional antenna, the best when the signals are faint. (or for hunting for the payload if GPS has broken but the transmitter works) Simple portable Yagi design Yagi Design Calculator
- Moxon - 2 element directional antenna, can be made out of two coat hangers, surprisingly good for ease of construction (typical example)
- Computer with a soundcard and an audio in/mic in running Windows, Mac OS X or Linux
- Cable to connect the radio to the computer - usually a 3.5mm jack (plug) to 3.5mm jack (plug) (should be 2-pole (mono) connectors but you can sometimes successfully utilize easier to find ready made stereo (3-pole) cables. If you are in the UK Cabling4Less and Lindy both have a reasonable range of stereo cable or Maplin stock 1.5 and 3.0m long mono cables.)
- Internet connection, anything from mobile broadband to normal broadband will do
- Software
- dl-fldigi - an adapted version of the free fldigi soundcard decoding software, this takes the audio that your radio outputs and decodes the balloons signal, it then sends the telemetry it's found over the internet to our server which plots the payloads position on to a map.
Background
How does this all work? We are using the receiver, soundcard, and computer to do Software Defined Radio.
This is using the computer to do a lot of the heavy lifting, rather than the traditional way which might be an integrated radio and modem, which is a lot less flexible (and more expensive!).
SSB (single sideband) radio was initially developed as a low power way to send voice. The exact way it is encoded and decoded are irrelevant.
We use it simply to capture a small part of the radio frequency spectrum, and shift it into a range the soundcard can accept.
How this works is that the transmitter broadcasts a '0' at 434.075MHz (for example) - the SSB radio is tuned to 434.074MHz (1000Hz lower). The SSB receiver outputs a tone that is simply the input frequency minus the tuning frequency.
| Data sent | Transmitter frequency | Receiver Frequency | Difference/output |
|---|---|---|---|
| 0 | 4340752000 | 434074000 | 1000 |
| 1 | 4340752200 | 434074000 | 1200 |
1000Hz and 1200Hz are easily in the audible range (the receiver will only output from around 300-3000Hz) - and are passed to the soundcard.
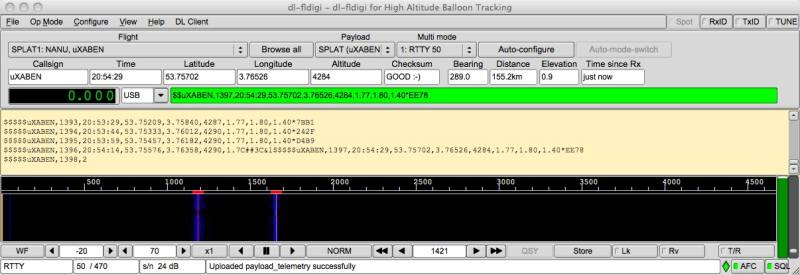
The tones are then used by fldigi to decode the RTTY signal - which is basically just RS232 - old fashioned serial - at 50 bits a second. The two tones appear in the above 'waterfall' window of fldigi (see below) as two yellow bands (other signals are interference and noise) and are what the decoder lines should be centred over.
There is a 30-sec recording of live data mp3 version and wav version. These files are about 500kB.
Please practice decoding in OFFLINE mode to eliminate any confusion with old data from this clip keep appearing on the map! You can do this by unchecking “online” on the “DL Client” dropdown. Settings to decode this should be 425Hz shift, 50 Baud, 8 bit ASCII, no parity and 2 stop bits. Decoding the data should look like this.
Unless you are very close, you won't hear anything unless you have line of sight. This means that the balloon usually needs to be above your horizon.
(The telemetry audio recording above was made by Daniel Richman during one of Robert Harrison's Icarus launches on Saturday 26th September 2009. The full “un-cut” two minute versions are mp3 and wav. Please note that these are about 1MB and 2MB respectively)
Radio
- Most balloon flights in the UK will use 434.075MHz as their main transmission frequency, however due to the cold temperatures the radio frequency often drifts so at some point you'll need to retune the receiver.
- Set up the radio, turn it on, select USB (Upper side band) and tune to 434.075MHz. Once the balloon has been launched you'll need to listen for a bit to see if you can hear anything then tune up and down a bit (say down to 434.065MHz and up to 434.085MHz). If you are using a directional antenna (e.g. Yagi) you'll need to point this in roughly the correct direction. Moving the antenna position may also help - some buildings block the radio frequency.
- You might still be out of range so if you don't hear anything check you've got the right settings and try again in 10 minutes. Pop on to #highaltitude to check that the launch has taken place and that others are getting the signal.
- Once you start hearing the signal it's time to get decoding.
Computer
dl-fldigi
dl-fldigi is an adapted version of the excellent free FLdigi soundcard decoding software. It takes the audio from your radio, decodes the balloon's signal, and then sends the telemetry it's found over the internet to a server running habitat, which plots the payloads position on to the SpaceNear map.
- First grab the latest version on the projects page: dl-fldigi
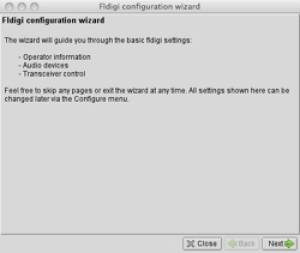
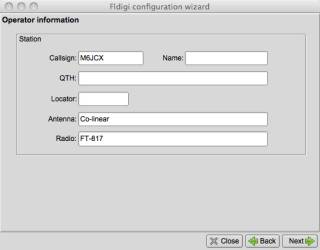
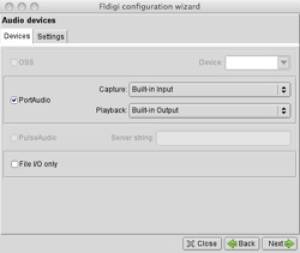
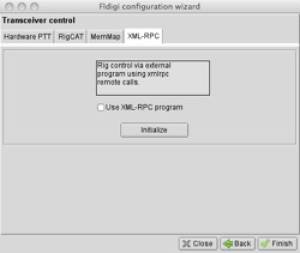
- Open up dl-fldigi in HAB mode (now the default mode for OSX). On first running it'll open up a wizard to help setup dl-fldigi for you.
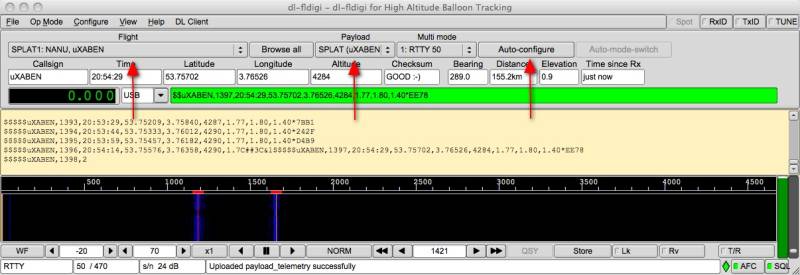
- This new version parses the data it receives and splits it up into the boxes and calculates the distance and bearing that the payload is from your base station (based on the latitude and longitude you previously input). You may need to resize the window width when you first open dl-fldigi to fit your screen.
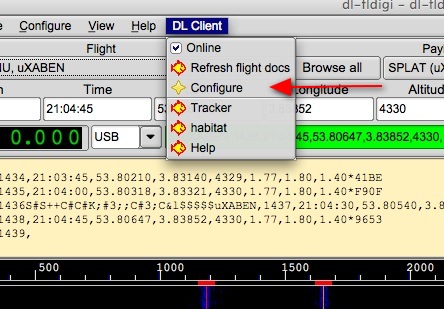
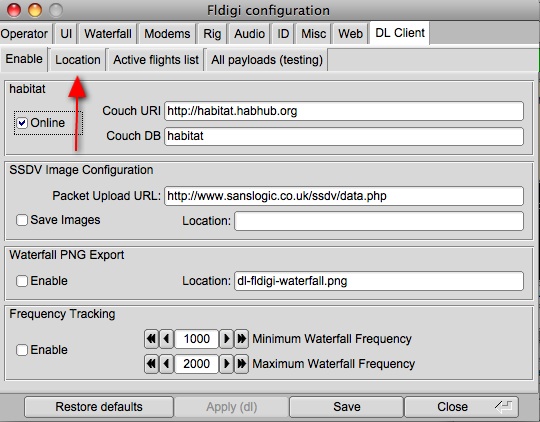
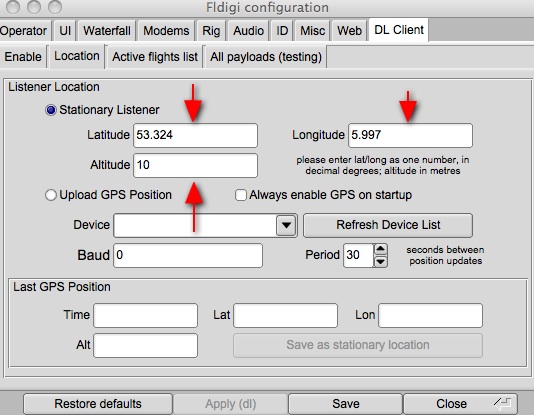
- First thing is to enter your location (this is required to appear on the map and to calculate distance, elevation and bearing (Please remember to put in your latitude and longitude in decimal format using + or - rather than NSEW e.g. 52.0000 -0.12345 You will also need to put in your altitude, you can put in 0 if you don't know this)
- dl-fldigi if connected to the internet should automatically download a list of the possible payloads. To view them select the 'Flight' dropdown box.
- Once you've selected your payload you need to click on the Autoconfigure button which will setup dl-fldigi for tracking.
- Green means that the string passed its checksum test while red means it failed. Feedback from the server can be seen in the bottom status box.
RxID or RSID
Not all of the modes are available using the Auto-config facilities, however there is the RxID facility
where by each transmission is preceded by a short burst of data that identifies the mode that will follow.
It also has the feature of being tracked by the AFC so it will also allow the receiver to be adjusted to
the correct centre frequency. To select this feature, turn on RxID as below:
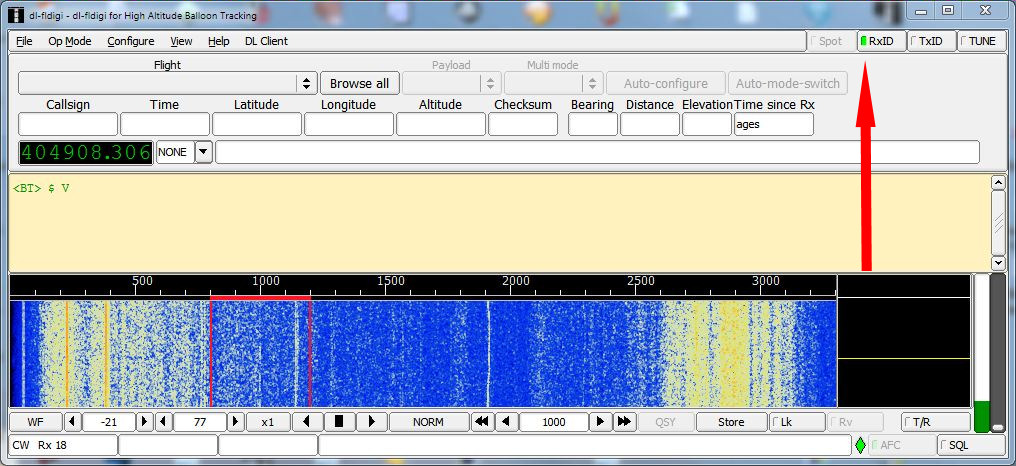
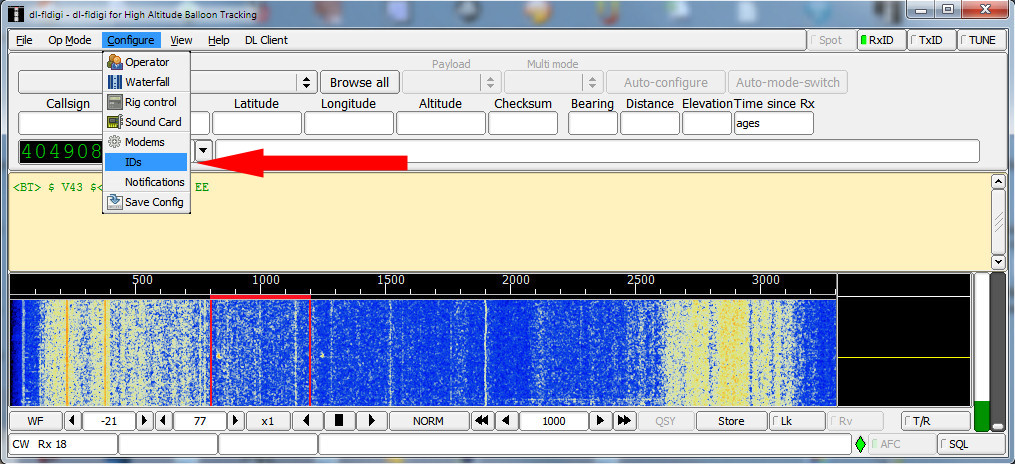
To setup the configuration for RxID, select the Configure | IDs option:
Turn on all the modes and select the options required, the “Search all Passband” and “Marker” are good defaults to choose:
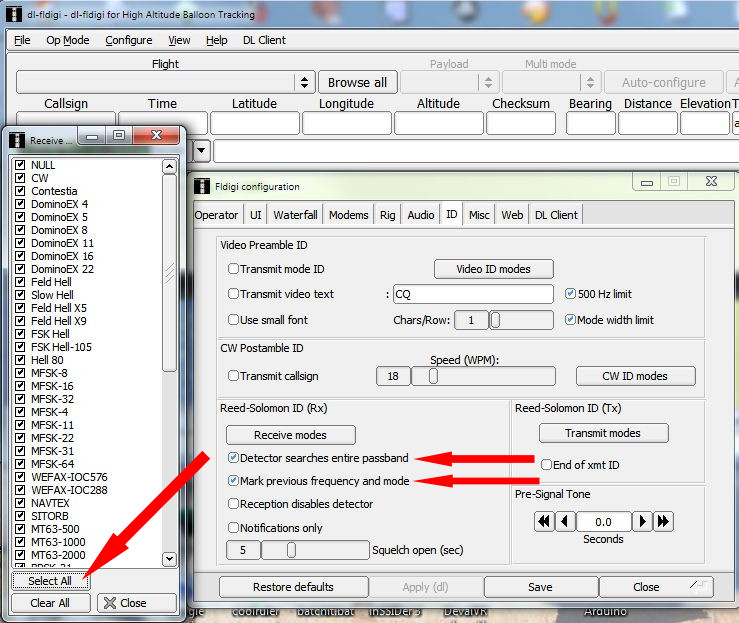
Finally Save the configuration and close the window, these should then remain as your default settings.
Internet
- dl-fldigi forwards the strings to the central server.
- Statistics and data can be found here http://habitat.habhub.org/
- The server does further checks and then will post the points to the habhub tracker
- You can also track using Google Earth by using the following link http://tracker.habhub.org/track.kml, for more details on how to get the best out of Google Earth see using_google_earth
- If you wish to try out receiving and decoding data without posting to the central server, then please refer to version specific instructions on the dl-fldigi project page.

