Table of Contents
Glider project
Following MiHAB 1 and 2, I've decided to try something new, hence the glider project. This project may merge with the UKHAS glider project, and I'm designing it to be applicable to other gliders.
Mark #2 Glider
With the glider used in flight 1 completely trashed, something new will be needed 
A second, and more serious problem is the GPS lag, approx 1.1 seconds for a sirf2. Solving this may mean that the correct error treatment cannot be used in the kalman filter, but more work is required. Running the filter back and forwards to pick up each GPS heading is not an option as there will be insufficient recources (ie SRAM and clock cycles).
Here is an overview of the planned system, it would appear that there is a lot to do, but much of the work has already been done for flight #1, so it may not be as hard as it appears 
Rogallo experiments
This RC rogallo is approx 1 meter long. The pitch control is not being used at present, but the “payload” is currently being rebuilt to include pitch control as well. The vertical and horizontal cross spars were added to improve the stability and remove the possible problem of the wing folding up or diving. It now seems extremely stable, and should fly in virtually any weather conditions.
It seems a rogallo can be made to descend vertically by moving the c of g well towards the back. This feature would be brilliant for landing. A small micro servo with pot removed for continuous rotation could be used to adjust the guy lines when the rogallo reaches 100 meters or so. Demonstration (unfortunatly a bit dark)
Flight 1
This appears to have gone into a spiral dive soon after release, descending at 15m/s into an industrial estate at the edge of St-Neots, it was found the next day and will be recovered shortly. Launch photos (at EARS)
Lessons for future
- Although the glider appreared quite stable in tests, a drop from a balloon is more violent, and there is a greater probability of the glider spiral diving.
- 9V lithium batteries cannot supply more than 100ma on a continuous basis
- Dividing up power supplies increases reliability i.e. flight computer and gps off a seperate battery from servo(s) and cutdown
- Only fly with 100% reliable code
- Use a high quality compiler
- Unless the aerodynamics is thoroughly tested, rigid gliders are only reliable with thermopile stabilization. Rogallos and parafoils are c of g stabilized, so more stable in that respect
- A wing trailing edge dipole antenna works very well
- Tethered drops are useful as an intermediate stage between “hill” tests and drop tests.
- It's best to test in the calmest possible weather
Simulation
Using just a basic approximation for the yaw behaviour of the glider, the oscillatory behaviour can be analised. A more advanced extropolation technique has now been tried out, taking the aerodynamic damping effects and current rudder position into consideration. It can be seen that the results are very encouraging. The +-15 degree range is reached within 2 seconds! and the glider stays there. This is very important as turbulence occurs on the 10 second timeframe, so the glider can recover from one disturbance in time for the next.
It would appear that approximating the current GPS heading from the current one and the previous makes the system more responsive and less prone to oscillation. A and B show the heading offset and servo position using the approximation technique, whilst C and D show the same data for uncorrected PID loop using the same constants (P=0.15,I=0.03,D=0.25) in E and F the value of D has been adjusted so that the overshoot is the same as in the corrected case, and it can be seen that for the same P and I, ie the same resistance to trim errors(I) and tendancy to head towards the target(P) we have far superior behaviour. Next step will be automated PID optimisation! Source code
EEPROM flight recording
After some unsuccessful powered flights and semi successful glides, I've removed the motors and speed controller, increased the size of the rudder and added flight data recording. Here are some flight tests, as it can be seen the system is unstable in the first (PI) series, and does not stabilize, a D term was added in the second series, and this looks more promising, but there were heavy gusts of sidewinds during the tests. Here is a third tests series just completed
Here are the values used, as can be seen, the problem is still not solve, I'm looking into more advanced filtering techniques to try and reduce the lag.
| Test | P | I | D |
|---|---|---|---|
| G | 0.1 | 0.01 | 0.38 |
| H | 0.1 | 0.03 | 0.45 |
| I | 0.14 | 0.03 | 0.45 |
| J | 0.1 | 0.02 | 0.4 |
| K | 0.08 | 0.01 | 0.38 |
| L | 0.09 | 0.01 | 0.45 |
| M | 0.15 | 0.02 | 0.45 |
| N | 0.09 | 0.01 | 0.39 |
Here are the values used in the second test series
| P | I | D |
|---|---|---|
| 0.1 | 0.01 | 0.42 |
| 0.1 | 0.01 | 0.45 |
| 0.15 | 0.05 | 0.65 |
| 0.15 | 0.04 | 0.75 |
| 0.15 | 0.03 | 0.7 |
Interestingly, when the rudder was made smaller, the period of oscillation increased, but the stability did not improve noticably. Runs D and E took place with a larger rudder (approx twice the area) of the later tests.
Here is a test running down the street. Some turns were made to avoid parked cars. Column C is servo position in degrees multiplied by approx 2.5 and D is heading offset from target.
Parawings/foils
Okay, well everybody is getting excited by them, so I've been experimenting with parawings, it does seem promising. Parafoils can be made from parafoil kites (off ebay for less than £20), but IMHO trimming them could be a pain and they are not brilliantly stable. Using a hang glider type design the parawing is probably more reliable, but only if it is semi rigid. I've made a video of a semi rigid parawing or Rogallo wing test.
I have now made a large Rogallo wing (sides 1.2M long) and got a 27MHz radio (Green band) to control it. This should be flying in the next few days 
Blueprint
This is the current idea, I have found 433Mhz antennas over at active robots, or Simple solutions so one of these looks good for the downlink. It will need a ground plane, a sheet of PCB might work, the radio could even be built on the other side. Rocketboy has some 300 baud modems for the 433Mhz band, the same as on MiHAB2. The gps ant may be moved to under the wings, and I hope to get a GPS helix antenna as well. The cutdown has not had much consideration, currently the hardware I've built is for a resistor based cutdown, but I may go for pyro one. The camera will hopefully have a UV filter over the lens, as these seem to help a lot. Fuselage will be made of blue insulation foam “styrofoam”. The wings will be off an RC plane, and the tail will need some consideration, I will need little hinges similar to off some RC planes. The phone may be left out as radio has been very sucessful and phone coverage is by no means total, as UKHAS1 demonstrated. Leaving out the phone will save a lot of weight and space.
(The 433Mhz antenna may be moved to under the wings, and the gps antenna may also be repositioned)
Master unit development
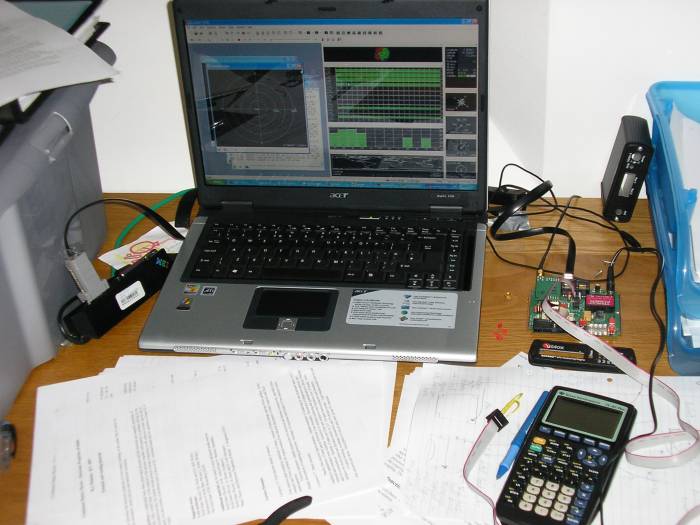
Following MiHAB3 this was heavily damaged, but repairs have now been made. Also the camera from MiHAB2 and 3 (yes it still works!) has been modified to use AA batteries for approx 5 hours battery life.
Modular design
The aim is to build an autopilot module that can be integrated with other payloads and gumstix and take control of a glider. There will be a command set for controling the module over a bidirectional serial link running a 19200 baud TTL logic levels, with RTS and CTS lines. There is a 10ms pause between the transmittion of each line from the autopilot.
Commands
- SLEEP puts the autopilot into sleep mode, servo off, replies "GOING TO SLEEP"
- WAKE UP wakes it up, replies "AWAKE"
- TARGET enables setting of target in decimal degrees, north followed by east.
- WIND enables setting of the predicted wind at this altitude, angle followed by speed in knots
- STATUS replies with list of variables, see code
- ABOUT displays a message about the autopilot
- CONSTANTS enables the setting of the P and I loop constants
- CUTDOWN cuts down the glider
Size ect
For the present autopilot size is approx 9x4x4cm, weight 70 grams for the electronics
Theory of operation
The plan is to make an autopilot that requires GPS only. I've considered digital compasses but decided that the errors caused by non horizontal positioning were a problem. However a rate gyro might be used in the future to increase the update speed, which at the moment is 1 Hz. Meaning that the glider will have to execute slow turns. The GPS velocity is only accurate at high speed >10mph , but hopefully this should not be a serious problem, as speed will be around 20mph at landing and higher in lower density atmospheric conditions. Wind data is collected on the way up and used to find the airspeed on the way down. There is not enough ram on the atmega8 to store accurate wind data, so this must be sent to the autopilot via the interface, hence the wind command. The code keeps the air vector pointing towards the target. There are a number of stages that can be seen in the code, first the gps fix must be converted into decimal degree format, then the distance to the target in equatorial degree units is found, i.e. units of distance where 1 is equal to 1 degree of longditude along the equator. We can then use arctan to find the bearing to the target, and rotate the wind vector and absolute heading vector into target=y frame of reference. Next we convert to cartesian coords, so wind can be subtracted from absolute velocity (what the GPS gives us) to give the air speed as a vector in the target_direction=Y frame. Finally we use a final arctan to get the offset angle of the airspeed from the target direction, and feed this into the final stage of servo control. There is also some code to drive indicator LEDs (power, GPS lock and left or right of target bicolor led), and some sanity checks at various stages to get our angles back to the +-180 degree range. If we are heading away (airspeed wise) from the target then the servo just goes to servomax. The final stage of servo control is via a PI loop, see wikipedia for more info on that. The servo pulses are generated by interrupts running off two registers, compare1a and compare1b, than go high when timer1 reaches their value.
Autopilot Module source code
Sorry this is poorly commented, hopefully its understandable. It's writtem in bascom basic, which can be found over at http://www.mcselec.com/
$regfile = "m8def.dat"
$crystal = 16000000
CONST Servomax = 2895
CONST Servomid = 2290
CONST Servomin = 1685
CONST Factor =(servomax - Servomin) / 60

DIM S AS STRING * 80
DIM B AS STRING * 6
DIM Contents(12) AS STRING * 11
DIM N AS Byte
DIM I AS Byte
DIM K AS SINGLE
DIM Recievedstring AS Byte
DIM Intcount AS INTEGER
DIM Test AS INTEGER
DIM L AS INTEGER
DIM Integral AS SINGLE
DIM T AS SINGLE
DIM Target AS SINGLE
DIM Offset AS SINGLE
DIM Wind_theta AS SINGLE
DIM Wind_theta_store AS SINGLE
DIM Wind_speed AS SINGLE
DIM X AS SINGLE
DIM Y AS SINGLE
DIM V AS SINGLE
DIM Wind_x AS SINGLE
DIM Wind_y AS SINGLE
DIM North AS SINGLE
DIM East AS SINGLE
DIM Target_e AS SINGLE
DIM Target_n AS SINGLE
DIM Store_east AS SINGLE
DIM Store_north AS SINGLE
DIM V_x AS SINGLE
DIM V_y AS SINGLE
DIM Minutes AS STRING * 7
DIM Degrees AS STRING * 3
DIM Command AS STRING * 10
DIM P_constant AS SINGLE
DIM I_constant AS SINGLE
Baud = 4800
OPEN "comb.0:4800,8,n,1,inverted" FOR INPUT AS #1
OPEN "comc.2:19200,8,n,1,inverted" FOR INPUT AS #2
OPEN "comc.3:19200,8,n,1,inverted" FOR OUTPUT AS #3
DECLARE SUB Serialio()
Config Serialin = Buffered , Size = 128 , Bytematch = 10
Config Pinc.5 = INPUT
Config Portc.4 = OUTPUT
Config Portb.1 = OUTPUT
Echo OFF
 P_constant = -0.60
 I_constant = -0.15
Config Portd = OUTPUT
Config Timer1 = TIMER , Prescale = 8
ON Compare1a Tim1_isr1
ON Compare1b Tim1_isr2
Intcount = 0
Recievedstring = 0
Portc.4 = 0
Portb.1 = 0
Compare1b = 40000
Compare1a = Servomid

Enable Interrupts
Enable Compare1a
Enable Compare1b


DO
 Again:
 IF Pinc.5 = 1 THEN
   CALL Serialio()
 END IF
 IF Recievedstring = 1 THEN
  INPUT S
  Recievedstring = 0
  B = Mid(s , 2 , 6 )
  IF B = "$GPRMC" THEN
   GOTO Process
  END IF
 END IF
 GOTO Again
   Process:                                                 'code to get decimal degrees
   I = Split(s , Contents(1) , ",")
   Degrees = Left(contents(4) , 2)
   Minutes = Right(contents(4) , 7)
   Wind_theta = Wind_theta_store - Target
   Wind_theta = Deg2rad(wind_theta)
   Wind_x = SIN(wind_theta)                                 'WORK OUT WIND IN TARGET =Y FRAME
   Wind_x = Wind_x * Wind_speed
   Wind_y = COS(wind_theta)
   Wind_y = Wind_y * Wind_speed
   North = 0
   North = VAL(minutes)
   North = North / 60
   K = 0
   K = VAL(degrees)
   North = K + North
   Degrees = Left(contents(6) , 3)
   Minutes = Right(contents(6) , 7)
   East = 0
   East = VAL(minutes)
   East = East / 60
   K = 0
   K = VAL(degrees)
   East = K + East
   IF Contents(7) = "W" THEN
    East = -east
   END IF
   Store_east = East
   Store_north = North
   East = Target_e - East
   K = Deg2rad(north)
   K = COS(k)
   East = East * K                                          'distance to target in equatorial degree units
   North = Target_n - North
   K = East / North
   Target = ATN(k)
   Target = Rad2deg(target)
   IF North < 0 THEN                                        'direction to target
    Target = Target - 180
   END IF
   IF Target < -180 THEN
    Target = Target + 360
   END IF
   K = 0
   K = VAL(contents(9))
   PRINT K
   V = 0
   V = VAL(contents(8))
   V = V + 0.01
   K = K - Target

   K = Deg2rad(k)
   X = SIN(k)
   X = X * V
   Y = COS(k)
   Y = Y * V
   V_x = X
   V_y = Y
   X = X - Wind_x
   Y = Y - Wind_y
   X = X / Y
   IF Y = 0 THEN
    X = 0
   END IF
   K = ATN(x)
   K = Rad2deg(k)
   IF Y < 0 THEN
    K = K - 180
   END IF
   IF K < -180 THEN
    K = K + 360
   END IF
   Test = VAL(contents(4))                                  'indicator leds
   IF Test = 0 THEN
    Portd.3 = 0
   ELSE
    Toggle Portd.3
   END IF
   IF K > 0 THEN
    Portd.4 = 0
    Portd.5 = 1
   ELSE
    Portd.4 = 1
    Portd.5 = 0
   END IF                                                   'start of main stuff
   Offset = K
   IF Y < 0 THEN                                            'tracking algorithm only active for air vector-> target
    K = Servomax                                            'to avoid possibility of going in opposite direction
   ELSE
    T = K * 0.1
    Integral = Integral + T
    T = Integral * I_constant
    IF T > 10 THEN                                          'integral windup prevention
     Integral = 10 / I_constant
    END IF
    IF T < -10 THEN
     Integral = -10 / I_constant
    END IF
    K = K * Factor
    K = K * P_constant
    K = K + T
                                                             'SERVOMID is servo center position
    K = K + Servomid
    IF K > Servomax THEN
     K = Servomax
    END IF
    IF K < Servomin THEN                                    '+ - 30 degree servo limits
     K = Servomin
    END IF
   END IF
   L = K
   Compare1a = L

LOOP


                                                           'tells us if we've got a string
Serial0charmatch:

  Recievedstring = 1

RETURN


Tim1_isr1:
  Portd.2 = 0
RETURN

Tim1_isr2:
  Timer1 = 0
  Portd.2 = 1
RETURN

SUB Serialio()

  Waituntilservooff:
  IF Portd.2 = 1 THEN                                       'wait until the servo is off
   GOTO Waituntilservooff
  END IF
  Disable Interrupts                                        'then disable interrupts
  PRINT "Rts-->Cts"
  Portc.4 = 1                                               'allow transmittion from master
  INPUT #2 , Command
  Portc.4 = 0
  SELECT CASE Command
  CASE "SLEEP" : Waitms 10
   PRINT #3 , "GOING TO SLEEP"
   GOTO Sleepmode

  CASE "STATUS" : Waitms 10
   PRINT #3 , Command                                       'reply saying what the command was
   Waitms 10
   PRINT #3 , Target_n
   Waitms 10
   PRINT #3 , Target_e
   Waitms 10
   PRINT #3 , Wind_y
   Waitms 10
   PRINT #3 , Wind_x
   Waitms 10
   PRINT #3 , Store_north
   Waitms 10
   PRINT #3 , Store_east
   Waitms 10
   PRINT #3 , V_y
   Waitms 10
   PRINT #3 , V_x
   Waitms 10
   PRINT #3 , Target
   Waitms 10
   PRINT #3 , Offset
   Waitms 10
   PRINT #3 , Integral
   Waitms 10
   PRINT #3 , Compare1a

  CASE "TARGET" : Waitms 10
   PRINT #3 , Command
   INPUT #2 , Target_n
   Waitms 10
   PRINT #3 , Target_n
   INPUT #2 , Target_e
   Waitms 10
   PRINT #3 , Target_e


  CASE "WIND" : Waitms 10
   PRINT #3 , Command
   INPUT #2 , Wind_theta_store
   Waitms 10
   PRINT #3 , Wind_theta_store
   INPUT #2 , Wind_speed
   Waitms 10
   PRINT #3 , Wind_speed


  CASE "ABOUT" : Waitms 10
  PRINT #3 , Command
  Waitms 10
  PRINT #3 , " # This is an autopilot module, commands are: "
  Waitms 10
  PRINT #3 , " # TARGET, WIND, SLEEP, WAKE UP, STATUS, CONSTANTS, CUTDOWN, and ABOUT."
  Waitms 10
  PRINT #3 , " # Firmware was written by Laurence Blaxter in Bascom basic, 2006"
  Waitms 10
  PRINT #3 , " # enjoy :-]"

  CASE "CONSTANTS" : Waitms 10
  PRINT #3 , Command
  Waitms 10
  PRINT #3 , P_constant
  Waitms 10
  PRINT #3 , I_constant
  INPUT #2 , P_constant
  Waitms 10
  PRINT #3 , P_constant
  INPUT #2 , I_constant
  Waitms 10
  PRINT #3 , I_constant


  CASE "CUTDOWN" : Waitms 10
  PRINT #3 , Command
  Portb.1 = 1
  WAIT 10
  Portb.1 = 0

  CASE ELSE : Waitms 10
   PRINT #3 , "WTF?"

  END SELECT
   GOTO Subend
   Sleepmode:
   IF Pinc.5 = 0 THEN                                       'wait until rts recieved
    GOTO Sleepmode
   END IF
    Portc.4 = 1
    INPUT #2 , Command
    Portc.4 = 0
    Waitms 10
    IF Command = "WAKE UP" THEN
     PRINT #3 , "AWAKE"
     GOTO Subend
    ELSE
     PRINT #3 , "WTF?"
    END IF
    GOTO Sleepmode

Subend:

Enable Interrupts
END SUB

CLOSE #1
CLOSE #2
CLOSE #3
END
4HZ GPS
Finally after much h4xoring I have worked out how to set the GPS to 4hz mode, 38400 baud and change the “dynamic platform model” to aircraft autopilot. Used u-center configuration tool and a serial port monitor. I've now got some code for the micro to print when it boots to reset the GPS. Unfortunately the GPS module seems to be drawing 350ma of current, it should be using less than 160ma, so there appears to be a ploblem, but I can't find it. I may try to contact u-blox and ask for advice. However, using 4 AA lithium batteries, the glider should still have in the order of 5 hours battery life.
Print Chr(181) ; Chr(98) ; Chr(6) ; Chr(19) ; Chr(0) ; Chr(0) ; Chr(25) ; Chr(81) ; Chr(181) ; Chr(98) ; Chr(6) ; Chr(8) ; Chr(0) ; Chr(0) ; Chr(14) ; Chr(48);       'config

Print chr(181);chr(98);chr(6);chr(8);chr(6);chr(0);chr(250);chr(0);chr(1);chr(0);chr(1);chr(0);chr(16);chr(150);chr(181);chr(98);

Print chr(6);chr(8);chr(0);chr(0);chr(14);chr(48);chr(181);chr(98);chr(6);chr(0);chr(1);chr(0);chr(1);chr(8);chr(34);chr(181);

Print chr(98);chr(6);chr(18);chr(0);chr(0);chr(24);chr(78);chr(181);chr(98);chr(6);chr(14);chr(0);chr(0);chr(20);chr(66);chr(181);

Print chr(98);chr(6);chr(2);chr(1);chr(0);chr(0);chr(9);chr(41);chr(181);chr(98);chr(6);chr(1);chr(2);chr(0);chr(1);chr(6);

Print chr(16);chr(57);chr(181);chr(98);chr(6);chr(3);chr(0);chr(0);chr(9);chr(33);chr(181);chr(98);chr(6);chr(3);chr(28);chr(0);

Print chr(6);chr(3);chr(16);chr(24);chr(20);chr(5);chr(0);chr(60);chr(60);chr(20);chr(232);chr(3);chr(0);chr(0);chr(0);chr(23);

Print chr(250);chr(0);chr(250);chr(0);chr(100);chr(0);chr(44);chr(1);chr(15);chr(0);chr(0);chr(0);chr(145);chr(84);chr(181);chr(98);

Print chr(6);chr(0);chr(1);chr(0);chr(1);chr(8);chr(34);chr(181);chr(98);chr(6);chr(0);chr(20);chr(0);chr(1);chr(0);chr(0);

Print chr(0);chr(208);chr(8);chr(0);chr(0);chr(0);chr(150);chr(0);chr(0);chr(7);chr(0);chr(3);chr(0);chr(0);chr(0);chr(0);

Print chr(0);chr(147);chr(144);chr(181);chr(98);chr(6);chr(0);chr(1);chr(0);chr(1);chr(8);chr(34);
Mark 2 adaptor board !:
GPS now has adaptor board:
However I am very worried about components overheating in low air density conditions, so the voltage regulators will be swapped for a high current version.
I now have a 4hz gps from u-blox, off ebay for £20 :) Also, u-center, off the u-blox website, which is a very nice application that can also be integrated with maps, could be used for real time tracking with a radio. This demo board is nice and has a 3W switched mode power supply, so I may use it in the glider if I have spare space.
RC plane testing
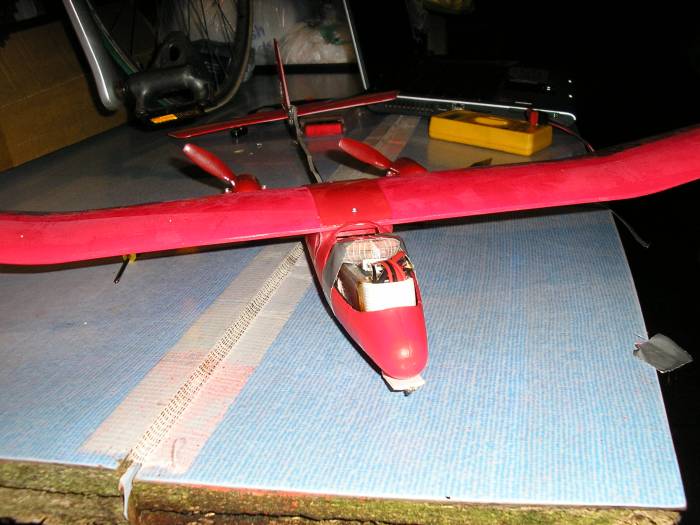
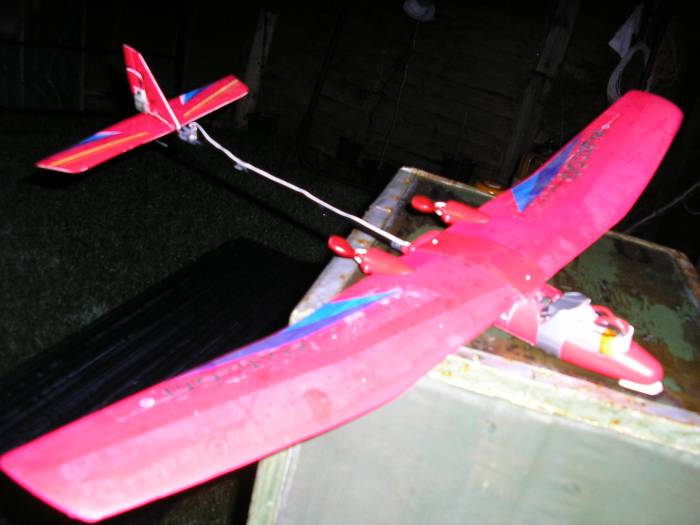
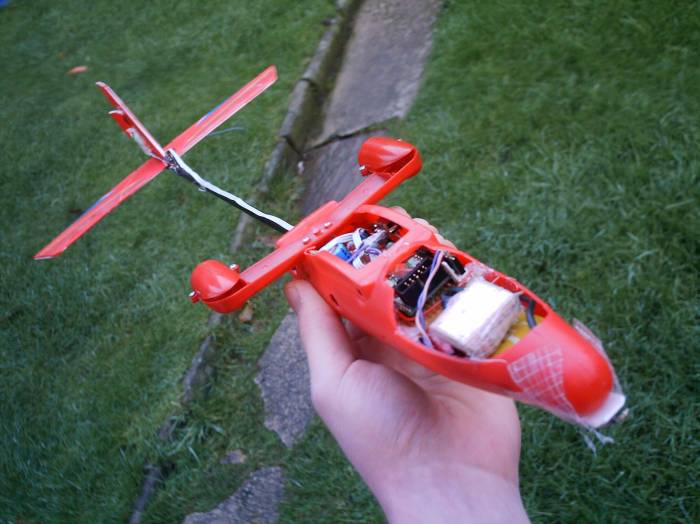
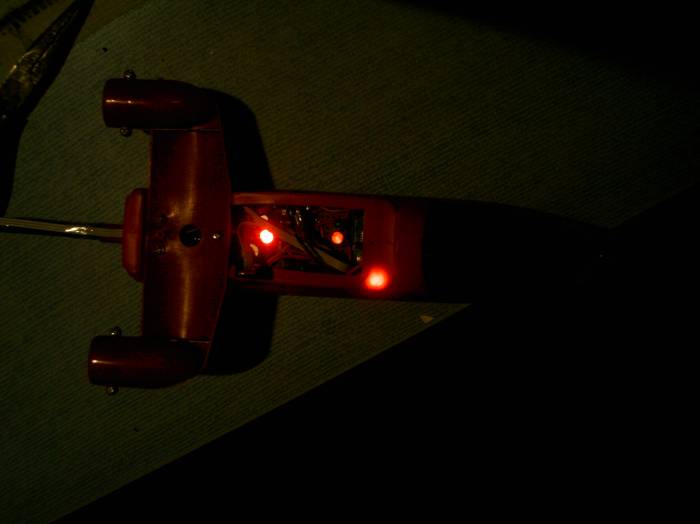
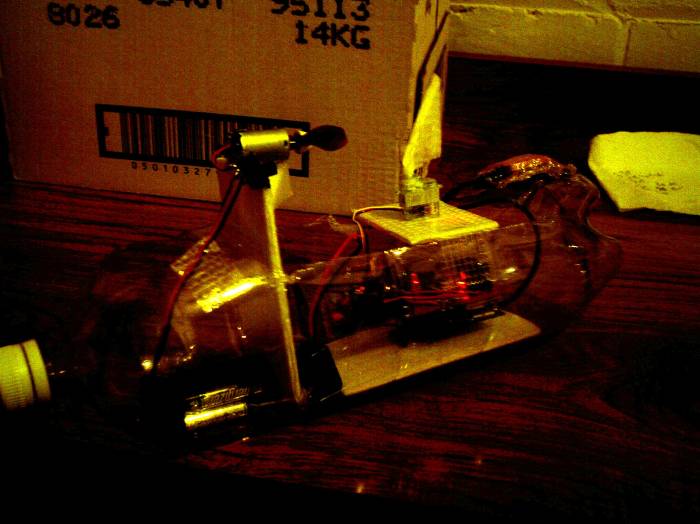
Following the failure of boat testing, I need something faster, preferably an RC plane where control can be passed to the autopilot by the pilot. I've got a glow engine plane but no experience of flying it, so any RC plane enthusiasts are welcome to help out. I've now modified an RC plane to take the autopilot, but the radio reciever had to be removed. Here are some photos. The cut down is capible of running motors, so I am investigating the possibility of reattatching the origional motors, with a li-poly battery of increased voltage (7.4 or 11.1 volts) to power the plane, or fixing a brushless motor with folding prop to the front, and using a brushless speed controller with an additional servo channel from the micro. Weight is the big problem, it will end up weighing more than the origional, so I will have to increase thrust somehow. The other plan is to tow it with an rc plane and use the cut down on the front to cut it loose.
this now has a 1.1 volt, 1.2 Ah li poly battery in the nose
Tape is just temporary while the epoxy was setting 


